on tackling a new/old house

Tuesday, June 30, 2009


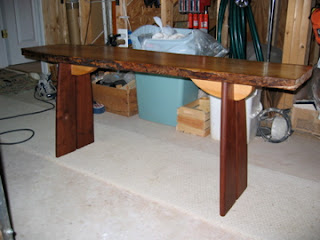
Thought I'd also show another part of the furnishings.

The fuse panel is next to the front door at the foot of the steps, the closest thing that could be called an "entry" to our house. It was not a pretty thing to look at from the living room and long ago we decided we'd cover it with something but deliberated on what that something was. Artwork? An entry mirror? Hmm.

We'd met Suzanne Crane, a ceramic artist from the Charlottesville area, at a few area craft shows. Her husband does great furniture grade finish work to compliment her ceramic tiles and basins. We couldn't afford one of their collaborative efforts so we purchased three of her tiles and I set about making an appropriate frame for them. I used the left-over material from the kitchen table project, reclaimed pine from a 200 year old warehouse in Georgia. It's beautiful stuff and compliments everything else in the house. We also had an old mirror from our house that was recut to fit this spot. Here's how it turned out.

It's hinged on the right side and stays closed with magnets glued on the back which stick to the fuse panel door. We turn off the hot water heater breaker when we're away and this hinge and magnet arrangement allows easy access to the panel each time we visit. My brother David helped me hang it when we were there for vacation last summer.

We've also added some artwork, a present I bought for Terry from our local artist, Ryan Dockiewicz at The Wooden Fish (www.woodenfishcc.com). She's a beaut and fills a big void on the wall in the kitchen. Gene's got a larger version at Kelly's Gingernut Pub and both are great works of art.


Well it's been a while as you can tell. We've been busy enjoying living in the house instead of working on it. Not that we haven't done some of that but the big jobs are all done and the furnishing continues. We even spent our summer vacation here last year but decided we really prefer vacations to be somewhere away from home.

But during our vacation I noticed one of the rafters on the front porch had some rot. This started the ball rolling to find lumber to replace it. It's not as easy as hopping down to the lumber yard, this stuff was made in the day when lumber was nominally sized 1/4" smaller than the given dimension instead of the 1/2" you get cheated out of today. A modern 2x4 is only 1 1/2 x 3 1/2, for instance. Fortunately I know a guy...

Brian Irminger at Cellar Root is a sawyer and will cut lumber to whatever size you want. He had some pine the right dimensions and I was all set. I bought it last fall so it could finish drying and after a false start with the rafter piece (it corkscrewed so Brian graciously provided a straight replacement) all is now on track.

I removed the old rotten parts and decided a roofer was called for to repair the flashing and roof decking which is made of tongue and groove pine boards. Here's the story:

I tore off the end covering boards, rotten beam and rafter and decided a roofer would be a better person to repair the decking. It's one of those things I decided is worth it to spend the money than tackle it myself. He'll repair/replace the rotten T&G pine roofing boards, re-use the shingles since they're only a few years old, and make it so there won't be any more leaks which led to this rot.

The guy we're using has an excellent reputation and is the first tradesman we've worked with on the shore that actually does what he says he'll do when he says he'll do it. I cut, painted, and put the up new beam and did all the prep work for the rafter but he wanted me to leave it off until he's done with the roofing work. I thought it would be better to have it up to support whatever he puts in but he says not. I'm counting on his expertise.

I also talked to him about a gable vent in the back of the house and a solar powered attic vent. We have ridge vents but there's no place for cooler air to enter so I can't see that the ridge vent does any good. I've only committed to the porch work so far but Terry thinks we need to get it all done. It's not a bad idea.

Some shots of the work in progress to this point ---

Reference photo: the end rafter on the front porch roof and the vertical siding and tie beam beneath it on this end of the front porch are all rotten. And you can see how well the red paint has held up over ~4 years. Our "little red house" is becoming "our little pink house". Our gravel driveway has a nice covering of bermuda grass and clover, don't you think?


The outside view of the porch from the driveway. It's strange that they used door casing to finish off the bottom of the T&G vertical siding they put up as a cover on the end. I'm thinking I'll space the new stuff off the rafter to let air flow behind it and over the top of it. It's hot up there when it's sealed at the ends but once the end came off the air flow was nice. Or maybe I should leave them off altogether?


What it looked like after I removed the end rafter, tie beam, and face boards. Water has clearly lifted the paint from the decking and the rot in the rafter was very thorough. Beneath this paint were two other colors, part of the story of this old house.


The outboard end at the corner post. The post is hollow and the end of the header beam that runs the full length of the porch is mitered. That was a surprise but nice to see. I cut the tie beam to match. The clamps? I accidently blew out a thin part of the mitered portion of the header beam so I glued it back together. No way do I want to replace a perfectly good 18' long 2x10 just to make the end pretty.


View looking down on the roof at the corner of the house. I think this is the source of the problem, flashing not sealed at the corner boards. Water seeps around the end, down the corner board, and runs into the head end of the rafter and ledger board supporting the roof. Our roofing guy says he'll make it right.


The old tie beam on the right. Considerable rot, no? Square cut nails in this and the roofing boards might be from the original construction in 1909 or some other time early in the 20th century. The beam is an old nominal 2x8, when they were undersized by 1/4" and not the 1/2" undersized versions you get today. That's why I went to my buddy Brian to buy the proper size you can see painted on the left. The middle piece is the replacement rafter I bought last fall, a full 2x4 I was going to plane down to size, but it became a corkscrew after sitting at the house over the winter. Brian's "kiln" is really just his tool shed with a dehumidifier. I expected a little movement but this was way beyond useful.


The new tie beam is ready to go up, on the left, and the new rafter is being planed to remove the significant raised grain left from Brian's drying process. He gave me this new rafter on Friday to replace the one that turned into a corkscrew. This one is actually closer to the right dimensions than the corkscrewed one and it only needed surface planing to clean it up. It's straight grained wood and planed beautifully. More about the plane later.


Finished and ready for installation. Did I mention everything was cut by hand with a dozuki saw? I got a lot of hand work practice on this project. By the way, the white house in the background is for sale....


Tie beam installed. I caulked around the mounting area after this photo was taken. Two long stainless deck screws from this side, two from the other side. I'll have to scribe the face board to match the siding, the old one came apart when I removed it so couldn't use it as a pattern. But I'm seriously thinking of leaving the vertical end boards off. I guess they might prevent rain from running down to the post and rotting it out.


Outboard end. Nailed here. Yes, I created some dimples. The vertical cover boards will hide my miss-hits. There is a filler piece on top of the beam to flush out the corner to match the 2x10. I took it off during the demo and I was glad to have it back on. I was afraid it would get caught up in the scraps from the demo that got swept up and thrown out. The tie beam is not level. I checked the beam at the other end of the porch and it's got the same tilt so I didn't worry about it.


The plane I used was the #4 I bought at an antique store in town. Brought it home, cleaned it up, and sharpened the blade back to square edged (it had a concave edge for some reason). I took my water stones down to do the job and discovered I'd left my honing guide at home when I set up to sharpen the blade. Did the best I could freehand and it was sufficient for this job. Dull bad. Sharp good.


While I was painting the rafter I repainted the front door and installed a new lock cylinder. We'd somehow lost track of the key and all the folks we've had in to check out or help with the renovations knew it was kept on the front door transom window sill so who knows where it got off to. Fortunately Watson's hardware store had a new cylinder.


By the way, if Watson's doesn't have it, you probably don't need it. It's somewhat like Nicholson's in Purcellville, Peregory's in Dahlgren, or my grandfather's old trading post only a little less so. But if you want pecans to shell or oyster tongs to go with your hunting license, hip waders, paint, glass, electrical or plumbing parts they're the place to go. And they're free with unsolicited advice or opinions of any kind. If you get to Watson's at the right time of day you might find a rocking chair out on the sidewalk to sit and shoot the breeze with some of the local guys that come to hang out. I'm not quite up to their social level yet so I'm content to observe the custom.


Next trip I hope to finish off this job. Don (the roofer) said he'd be done by then but I'll have to do the painting. "I don't paint" was all he said when I asked him if he was going to paint what he put up. For the low price he's charging I guess I can't complain.


Friday, February 15, 2008

Furnishings


Once the finish carpentry was done we began to furnish the house.  This is an ongoing project, mind you.  I made a few pieces for the house and one, Kate's bed, was requisitioned for our regular house.  Mind you, this post isn't here to brag about my efforts but to explain where some of the furnishings came from.  Things were made to accomodate the small spaces available for them and we could find few things that aren't made for the larger sized houses we seem to live in today.


Other things I made are a console table and a coffee table, a new top for our kitchen table (it was warped pretty badly), and a cabinet for storing necessities in the bathroom. 


The latest creation is a linen cupboard made entirely of recycled materials including window sashes from an old hotel in Virginia Beach given to us by our friend Sandy (thanks, Sandy!).


We've also purchased some Windsor stools from Kurt Lewin's place in Capeville.  He does very nice work and you should check him out if you're ever heading down Rt 13.


How it was and how it turned out


Things are still a work in progress, furnishings are still being gathered and brought into the house but at least you can see where things stand today.
  

Here are some before and after photos and compare them to the shots in previous posts to see the contrast.   The last photo is from the kitchen towards the front of the house.  Compare this view to the one on the October 22nd post.


The back story...


I was finally able to get some photos of the AMH during and before the renovations began. Steve had photographed his progress and I finally digitized some of them.


Here are shots of the house 
before work began, during demolition, and reconstruction. I'm glad we got it in the stage we 
did, he worked pretty hard to see the vision of what was possible with this old house!


During the renovation, Steve removed everything that wasn't holding up the house.  The house now has all new wiring, plumbing, insulation, and subflooring in the kitchen area.


Here you can see what happened to the stairs.  The stained glass windows came from a renovator's store in Norfolk.  We haven't been there yet but it's on our list of places to visit.


Monday, August 13, 2007

Picking up where we left off

Terry did a great job telling our story but there's more that's happened since the last photos were posted in the fall of '06. I'm assembling the photos and will be making additions in the near future but I think Miss Alice Moses would view the change from where our story began as very dramatic. Not Enon Hall dramatic, but a pretty big change from our perspective.

Stay tuned, more within a week or so. We'll try to include some photos of the house renovations prior to our purchase so you can see just how far this little house has come.

turning it all over

John's been wanting this blog updated for far too long, so now it's his to write on. I like the writing of it, just not the schedule. So it's a new voice for all. TaraBlue

Sunday, October 22, 2006

Kitchen, tile counters and backsplash wall


Here's how the kitchen tile turned out on the counter tops.  We went with an epoxy grout and while this looks really nice I don't think I'll have tile counter tops again.  You can also see our way cool cork flooring!  I wondered how this was going to hold up in a potentially wet area but so far it's been great going on a year and half.

I built the backsplash and assembled and installed all the cabinets.  Steve helped with some of the assembly but when it came time to hang them on the wall it was all on me.  Did I mention old houses aren't level or plumb?

The white backsplash is a set of shelves where we store books, maps, games, and other things we like to have handy at the dining table.  This photo doesn't show the shelves but they're there in later posts.

kitchen countertops

Kitchen countertops were a huge discussion/decision.

Formica or similar would be cheap & relatively simple, but easy to tear up and if we every decide to rent out could be a constant maintenance item.

Didn't consider Corian or granite, but Silestone was tops on my list. Good looking & very durable, in fact, practically indestructible...but also expensive.

Last option considered was tile, durable & moderate in cost.

Weighing in on all these options, besides cost & maintenance, was the problem of getting the countertop installed.

The standard solution to use Home Depot/Lowes for installs (formica & Silestone) wasn't simple. Although both chains are just some 20-30 miles away, that distance is over the Chesapeake Bay Bridge Tunnel (CBBT) which is a 17-mile span over the bay & a cost of $12.00 one way. And at the time we were lining up a countertop install neither chain would cross the bridge. In fact, both chains directed us to Salisbury, MD...well over 90 miles away.

In the end, we decided to go with tile & have ClayWerks do the install. Virtually painless, and since they did such a stellar job on the upstairs shower, it was a given they we'd have them do the tile work in the kitchen.

Getting work done on the Eastern Shore has been a challenge.

Wednesday, October 18, 2006

gearing up for another working weekend

making lists & setting up for, maybe, the last big working weekend. mostly finishing projects from here on out. paint touch-ups, cabinet knobs, hanging light fixtures. Clay Werks installed the countertops (tile) this week, looking forward to seeing how it looks. appliances still have to go in and the rest of the cork floor installed on the main floor, then baseboard...but it's really close.

Monday, October 16, 2006

the end in sight

J---:
Starting last year I have been working on our own little project on the Chesapeake Bay.

Things are beginning to take final shape and we can see the end of the major work in sight within the next month or so. We only have first level flooring, kitchen countertops, and trim molding on the first level to complete our project. We'll be converting our construction loan to a mortgage and will then be able to throttle back on the pace of our efforts. We'll be taking care of some remaining details in a more leisurely pace.

After all, ours is a very simple house built for what was at the time a lower class citizen. The finishes were simple without a lot of detail (1x trim, for instance, instead of beaded moldings) and that's helped us keep ahead of this race with the one year construction loan. I'm building furniture to put in our house but it's not the same scale project as a renovation/restoration. At least it'll help keep my head in the game.

With the end in sight it's almost bittersweet. I've really enjoyed watching how our efforts transformed an empty shell to a real home. It's been a good first outing. I've wanted to do a project like this for 25 years.

The day will soon come when my sawhorses will be folded until the next batch of trim needs to be painted, the ladder will once again hide in the garage. Paint brushes will get the final cleaning, etc. So it will be a sad thing and a happy thing when I pack up my chop saw and air nailer for the last time and bring them back to my home in Northern Virginia. I'm not quite sure I'm looking forward to the end.

Monday, September 25, 2006

stair progression, 4


carpet now installed, looking almost finished